Crossbow Beginner HQ
Ravin Crossbow Eye Relief Adjustment Guide for Beginners
Struggling with a blurry scope image, black shadows around the edges, or inconsistent accuracy? The problem may not be your scope at all. It could be your eye relief. This beginner-friendly guide explains how to adjust eye relief on a Ravin crossbow scope so you can shoot comfortably and accurately.
- ✓Learn what eye relief means
- ✓Set your scope correctly in minutes
- ✓Avoid common beginner mistakes
Table of Contents
Introduction
Why Eye Relief Matters
Step-by-Step Eye Relief Adjustment
Common Beginner Mistakes
Troubleshooting
Recommended Gear
Related Articles
FAQ
Final Thoughts
Introduction
Many new Ravin owners focus on sighting in, leveling the scope, and adjusting the speed dial, but overlook one of the simplest setup steps: eye relief.
Eye relief is the distance between your eye and the rear lens of the scope. If that distance is wrong, the scope image may appear blurry, shadowed, or incomplete.
The good news is that eye relief is easy to fix. A few minutes of adjustment can make your Ravin scope much more comfortable and improve shooting consistency.
Get The Free Ravin Owner Maintenance Pack
Avoid expensive beginner mistakes and protect your Ravin investment with our free Ravin Owner Maintenance Pack.
- ✓ Beginner Setup Checklist
- ✓ Maintenance Checklist
- ✓ String Inspection Sheet
- ✓ Pre-Season Inspection Checklist
- ✓ Range Day Checklist
- ✓ Maintenance Calendar
Why Eye Relief Matters
Many beginners think eye relief only affects comfort. In reality, it affects several important parts of the shooting process.
Clear Sight Picture
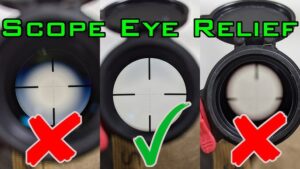
Proper eye relief eliminates black shadows and gives you a full field of view.
Better Accuracy
Consistent eye position helps you aim the same way from shot to shot.
Comfort
You will not need to stretch your neck or move your head unnaturally.
The Ravin owner’s manual generally recommends approximately 2–3 inches between your eye and the rear lens, but your exact position should feel natural and provide a complete sight picture.
If you have not mounted your scope yet, read Ravin Scope Setup Tutorial for Beginners and How to Level a Ravin Crossbow Scope at Home.
Step-by-Step Eye Relief Adjustment
Step 1: Place the Crossbow on a Stable Surface
Use a shooting bench, table, gun vise, or shooting bags. The goal is to prevent movement while making adjustments.
Do not attempt to adjust eye relief while standing and holding the crossbow unsupported.
Step 2: Loosen the Scope Rings Slightly
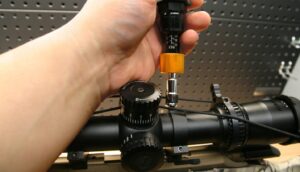
The scope should be loose enough to slide forward and backward but still stay in place. Do not completely remove the ring screws.
Step 3: Shoulder the Crossbow Naturally
Bring the crossbow into your normal shooting position. Do not force your head forward or backward.
Your scope should be adjusted to fit your natural shooting posture, not the other way around.
Step 4: Move the Scope Forward and Backward
While looking through the scope:
- Move the scope slightly forward.
- Move the scope slightly backward.
- Find the position where the image appears complete.
- Eliminate any black rings or shadows.
When properly adjusted, you should see the full scope image almost instantly when mounting the crossbow.
Step 5: Confirm Consistency
Put the crossbow down. Shoulder it again several times.
Each time, the scope image should appear clear without searching for the correct head position.
Step 6: Tighten the Scope Rings
Once satisfied, tighten the ring screws gradually using an alternating pattern. Avoid over-tightening.
Many beginners accidentally rotate the scope while tightening. Verify the reticle remains level before final tightening.
Do Not Stop at Eye Relief
Eye relief is only one part of proper Ravin setup. Download the free Ravin Owner Maintenance Pack to help you check setup, maintenance, string inspection, pre-season prep, range-day basics, and your maintenance calendar.
- ✓ Beginner Setup Checklist
- ✓ Maintenance Checklist
- ✓ String Inspection Sheet
- ✓ Pre-Season Inspection Checklist
- ✓ Range Day Checklist
- ✓ Maintenance Calendar
Common Beginner Mistakes
Mounting Too Far Back
This creates eye strain and can make the image harder to acquire quickly.
Mounting Too Far Forward
The image may appear small or surrounded by shadows.
Changing Head Position
Consistency matters. Use the same cheek weld and head position each shot.
Adjusting Eye Relief Before Your Shooting Position Is Established
Always establish your normal shooting posture first. The scope should fit your natural position.
Ignoring Scope Level
A scope with perfect eye relief but poor leveling can still cause accuracy issues.
Read: How to Level a Ravin Crossbow Scope at Home
Troubleshooting Eye Relief Problems
| Problem | Likely Cause | Fix |
|---|---|---|
| Black shadow around image | Incorrect eye relief | Move the scope forward or backward |
| Blurry sight picture | Eye relief or focus issue | Adjust ocular focus and eye position |
| Need to stretch neck | Scope positioned incorrectly | Reposition the scope |
| Inconsistent groups | Inconsistent head position | Practice repeatable cheek weld |
| Difficulty acquiring target | Poor eye relief setup | Readjust scope location |
Recommended Gear
The following accessories can make scope setup easier:
- Bubble level kit
- Torque screwdriver
- Shooting bags
- Crossbow vise
- Rangefinder
- Quality target
Helpful Ravin Setup Accessories
A simple bubble level and torque driver can prevent many scope setup problems and help you achieve better long-range accuracy.
Related Articles
How to Level a Ravin Crossbow Scope at Home
How to Sight In a Ravin Crossbow Scope
Ravin Crossbow First Shot Checklist for Beginners
Ravin Crossbow Instructions for Beginners
10 Common Ravin Crossbow Setup Mistakes to Avoid
How to Improve Ravin Crossbow Accuracy
Frequently Asked Questions
What is eye relief on a Ravin crossbow scope?
Eye relief is the distance between your eye and the rear lens of the scope.
How far should my eye be from a Ravin scope?
Most Ravin scopes work best with approximately 2–3 inches of eye relief, but the final position should give you a full, clear sight picture.
Why do I see black shadows in my scope?
Black shadows usually indicate incorrect eye relief or poor head position.
Can eye relief affect accuracy?
Yes. Inconsistent eye position can create inconsistent aiming and shot placement.
Should I adjust eye relief before sighting in?
Yes. Eye relief should be established before serious sight-in work begins.
Can I adjust eye relief without removing the scope?
Usually yes. Slightly loosen the rings and slide the scope forward or backward.
Final Thoughts
Eye relief is one of the simplest yet most overlooked parts of Ravin scope setup.
Taking a few minutes to position your scope correctly can improve comfort, reduce eye strain, eliminate shadows, and help you shoot more consistently.
If you are setting up a Ravin crossbow for the first time, do not stop with eye relief. Make sure your scope is mounted correctly, leveled properly, and sighted in before hunting season arrives.
Get The Free Ravin Owner Maintenance Pack
Get all 6 printable Ravin owner resources in one free download and avoid costly beginner mistakes.
- ✓ Beginner Setup Checklist
- ✓ Maintenance Checklist
- ✓ String Inspection Sheet
- ✓ Pre-Season Inspection Checklist
- ✓ Range Day Checklist
- ✓ Maintenance Calendar
“`