“`html
Ravin Scope Setup Tutorial for Beginners
A Ravin crossbow can be extremely accurate, but only if the scope is mounted, leveled, focused, and sighted in correctly. This beginner-friendly tutorial walks you through the complete Ravin scope setup process so you can avoid common mistakes before your first serious range session.
- ✓Learn how to mount, level, and adjust a Ravin scope
- ✓Understand eye relief, FPS dial setup, and sight-in basics
- ✓Avoid beginner scope mistakes that hurt accuracy
Table of Contents
Introduction
Beginner Scope Setup Overview
Safety Before Scope Setup
Ravin Scope Parts Explained
Tools You Need
How to Mount a Ravin Scope
How to Set Eye Relief
How to Level a Ravin Scope
How to Adjust Scope Focus
How to Sight In a Ravin Scope
FPS Speed Dial Explained
Accuracy and Performance Tips
Scope Maintenance and Care
Recommended Beginner Accessories
Supporting Articles
FAQ
Conclusion
Introduction
If you are new to Ravin crossbows, scope setup can feel confusing at first. You may see terms like eye relief, FPS dial, reticle, windage, elevation, speed calibration, and mechanical zero. That sounds technical, but the process becomes much easier when you follow it in the right order.
The biggest mistake beginners make is jumping straight to sighting in before the scope is truly ready. A scope that is loose, too close to your eye, tilted, blurry, or set to the wrong speed can make a good crossbow look inaccurate.
This guide gives you a beginner-friendly Ravin scope setup tutorial from start to finish. You will learn how to mount the scope, set eye relief, level the reticle, adjust the ocular lens, sight in at the proper distances, understand the FPS dial, and troubleshoot common accuracy problems.
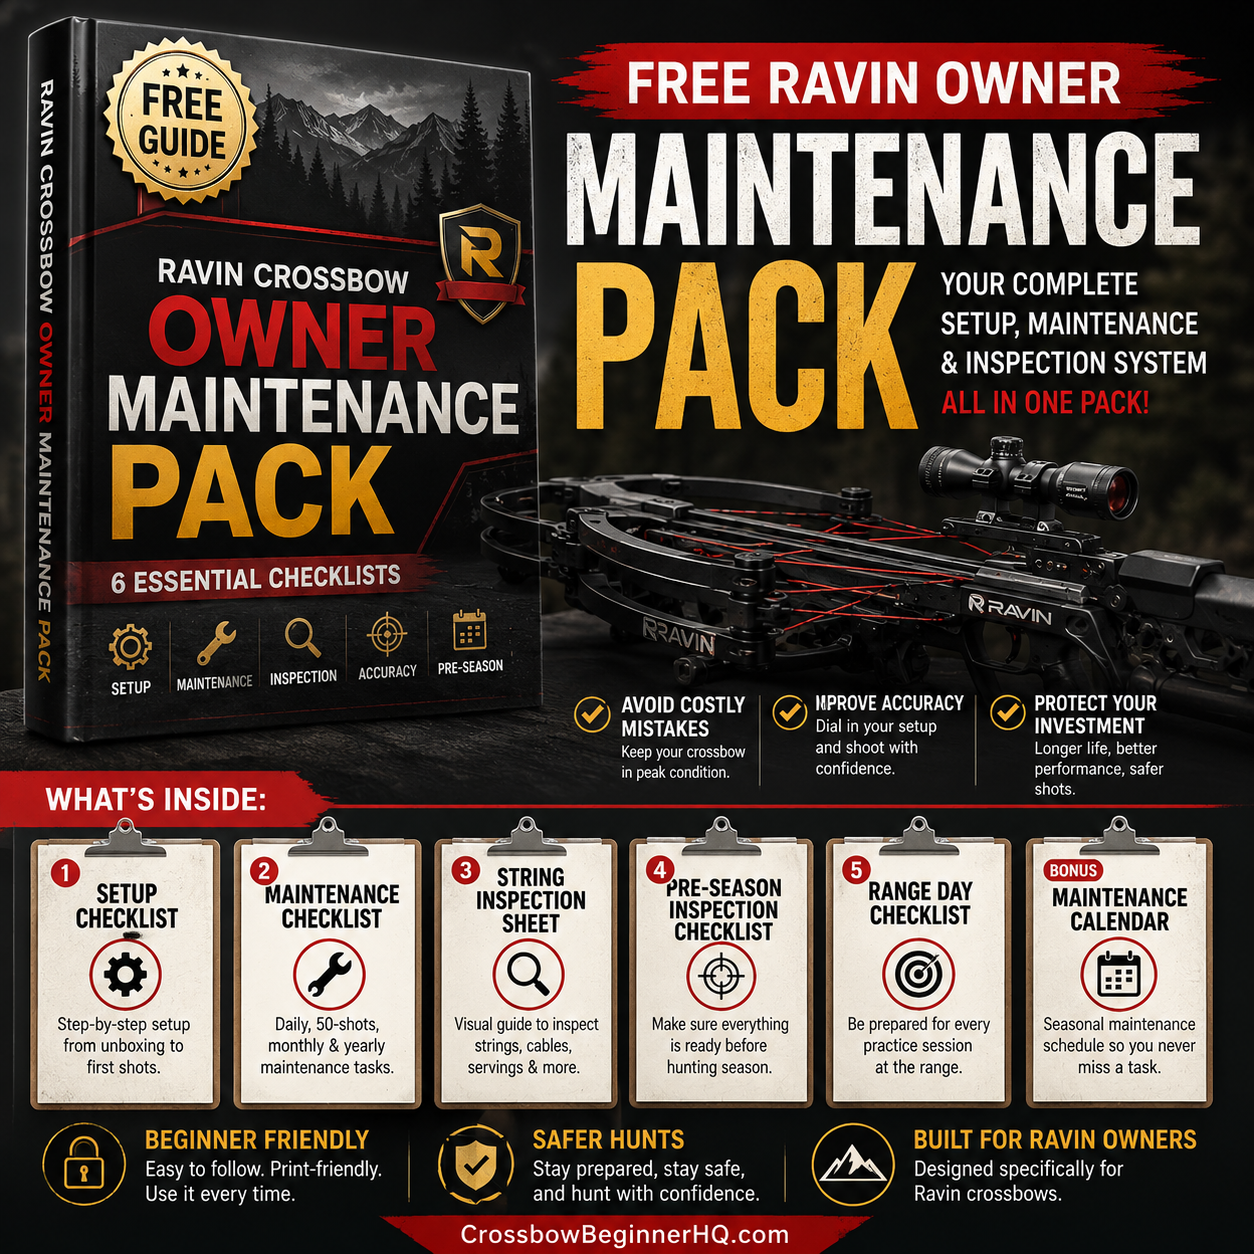
Get The Free Ravin Owner Maintenance Pack
Avoid expensive beginner mistakes with our free Ravin Owner Maintenance Pack.
- ✓ Beginner Setup Checklist
- ✓ Maintenance Checklist
- ✓ String Inspection Sheet
- ✓ Pre-Season Inspection Checklist
- ✓ Range Day Checklist
- ✓ Maintenance Calendar
Beginner Scope Setup Overview
A Ravin scope setup has six main parts:
Mounting
The scope must sit securely in the rings without being over-tightened.
Eye Relief
Your eye needs the right distance from the scope so you see a full, clear image.
Leveling
The scope must be level with the crossbow to avoid left and right misses.
Focus
The reticle should look sharp to your eye before you begin serious sight-in work.
Sighting In
You adjust point of impact until your arrows hit where you aim.
Speed Calibration
The FPS dial or turret system must match your crossbow and arrow setup.
For beginners, the order matters. Do not sight in first and level later. Do not change the speed dial randomly. Do not adjust the turrets before confirming the scope is mounted correctly.
Safety Before Scope Setup
Scope setup should always start with safety. Make sure the crossbow is unloaded, uncocked when appropriate, pointed in a safe direction, and handled according to the official manual.
Beginner Safety Rules
- Keep the crossbow pointed in a safe direction.
- Keep your finger off the trigger until ready to shoot.
- Keep hands and fingers away from the bowstring path.
- Use only Ravin-approved arrows, nocks, strings, cables, and components for your model.
- Use a safe target and backstop when sighting in.
- Never look at the sun through the scope.
- Never dry-fire the crossbow.
Ravin Scope Parts Explained
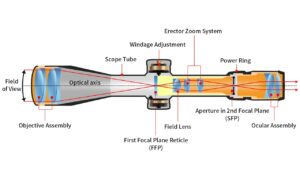
Before you adjust anything, it helps to understand the basic scope parts.
Ocular Lens
This is the rear lens closest to your eye. You adjust it so the reticle looks sharp and clear.
Objective Lens
This is the front lens of the scope. Keep it clean and protected when not in use.
Reticle
The reticle is the aiming pattern inside the scope. Ravin scopes may include distance marks or dots that correspond to different yardages.
Windage Adjustment
Windage moves your point of impact left or right.
Elevation Adjustment
Elevation moves your point of impact up or down.
FPS Speed Dial or Turret
This helps match the scope to your crossbow’s advertised speed and arrow setup. Once calibrated, it should not be changed casually.
Tools You Need for Ravin Scope Setup
You do not need a full pro shop to understand the basics, but you do need the right tools if you are mounting or adjusting the scope yourself.
- Official Ravin owner’s manual
- Scope rings included with your Ravin package
- Correct hex wrench or screwdriver
- Torque driver measured in inch-pounds
- Small bubble level or scope leveling kit
- Stable shooting bench or workbench
- Crossbow-rated target
- Safe backstop
- Approved Ravin arrows and field points
- Lens cleaning cloth
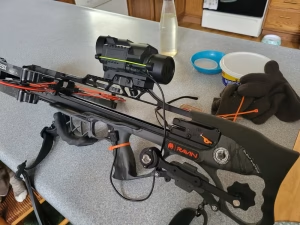
How to Mount a Ravin Scope
Ravin recommends having your scope mounted by a local pro shop if you are not comfortable doing it yourself. If you choose to mount it yourself, go slowly and follow the manual for your exact model.
Step 1: Attach the Bottom Rings
Place the bottom scope rings on the rail in the approximate position shown in your manual. Keep them loose enough that you can still adjust their position.
Step 2: Lay the Scope Into the Rings
Set the scope into the bottom rings. Place the top rings over the scope and lightly snug the screws. The scope should still be able to move forward, backward, and rotate slightly.
Step 3: Check Eye Relief Before Tightening
Before final tightening, shoulder the crossbow in your normal shooting position. Move the scope forward or backward until you can see a full field of view.
Step 4: Tighten the Ring Bases
Once the scope is positioned correctly, tighten the scope ring base nuts or screws according to the official Ravin manual. Do not guess on torque.
Step 5: Level Before Final Tightening
Do not fully tighten the upper rings until the scope is leveled with the crossbow. Leveling is covered in detail below.
How to Set Ravin Scope Eye Relief
Eye relief is the distance between your eye and the eyepiece. If the scope is too close, too far away, or inconsistent, your sight picture can look dark or incomplete.
For many Ravin setups, the manual points beginners toward roughly 2–3 inches from the eye to the eyepiece when holding the crossbow in a shooting position.
How to Check Eye Relief
- Shoulder the crossbow naturally.
- Keep your head in a comfortable shooting position.
- Look through the scope.
- Move the scope forward or backward until the image is full and clear.
- Choose the furthest forward position that still gives a complete field of view.
Poor eye relief can make beginners think the scope is defective. In many cases, the issue is simply that the scope is not positioned for the shooter’s natural posture.
For more detail, read: Ravin Crossbow Eye Relief Adjustment Guide.
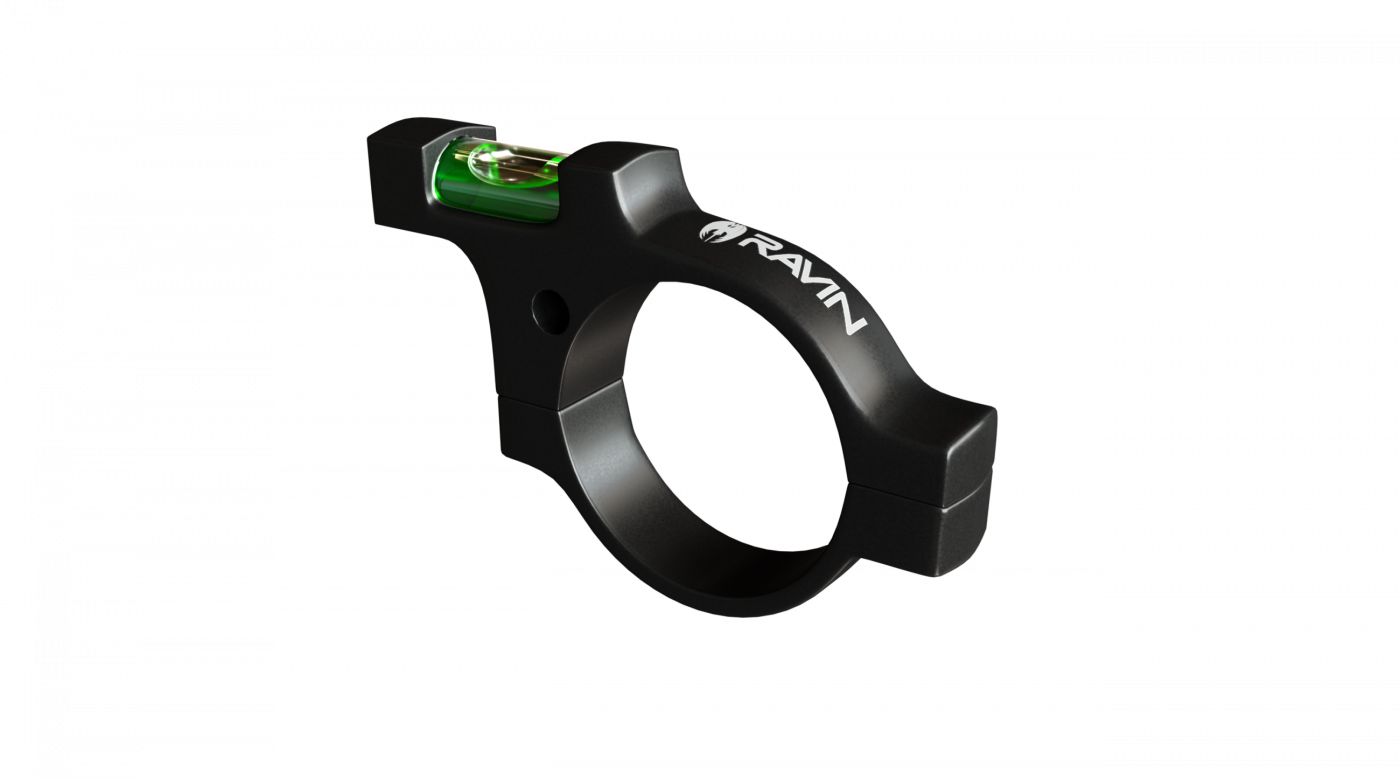
How to Level a Ravin Scope
Scope leveling matters because a tilted scope can cause left or right misses, especially as distance increases. This is called scope cant.
Step 1: Level the Crossbow First
Place the crossbow on a stable surface. Use a level on the limb mounts or another manual-approved reference point to confirm the crossbow is level.
Step 2: Level the Scope
Place a level on the elevation turret. Rotate the scope in the rings until it is level with the crossbow.
Step 3: Align the Reticle
The horizontal reticle markings should be parallel with the crossbow limbs. If the reticle is tilted, your point of impact may drift sideways at distance.
Step 4: Tighten Evenly
Tighten the upper rings gradually while alternating between front and back screws. Keep watching the levels while tightening.
For the full process, read: How to Level a Ravin Crossbow Scope at Home.
Don’t Skip These 6 Ravin Owner Resources
Most accuracy problems start before the first shot.
Download the free Ravin Owner Maintenance Pack and make sure your setup, maintenance, and inspection process is complete before heading to the range.
- ✓ Beginner Setup Checklist
- ✓ Maintenance Checklist
- ✓ String Inspection Sheet
- ✓ Pre-Season Inspection Checklist
- ✓ Range Day Checklist
- ✓ Maintenance Calendar
How to Adjust Ravin Scope Focus
Before sighting in, make sure the reticle looks sharp to your eye. This is done with the ocular lens adjustment at the rear of the scope.
Simple Focus Process
- Hold the scope about 2–3 inches from your eye.
- Look at an object around normal shooting distance.
- If the reticle looks blurry, rotate the rear eyepiece.
- Continue until the reticle appears sharp and clear.
Do this before adjusting windage or elevation. A blurry reticle makes it harder to aim consistently.
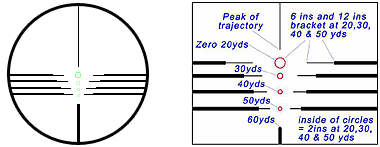
How to Sight In a Ravin Scope
Sighting in means adjusting your point of aim so it matches your point of impact. In simple terms, you want the arrow to hit where the reticle is aimed.
Step 1: Choose a Safe Shooting Area
Use a crossbow-rated target in front of a safe backstop. Make sure nobody is near or behind the target.
Step 2: Set the FPS Dial First
Before your first shot, rotate the FPS speed dial to match the manufacturer’s advertised speed for your Ravin model.
Step 3: Start at 10 Yards
Start close. This helps confirm you are safely on target before moving back. Use the correct aiming point according to your scope instructions.
Step 4: Move to 20 Yards
Once your point of impact matches your point of aim at 10 yards, repeat the process at 20 yards. Make small windage and elevation adjustments.
Step 5: Move to 50 Yards
After the 20-yard setup is confirmed, move to 50 yards and use the 50-yard aiming point. This is where you establish the important mechanical zero for many Ravin scope setups.
Step 6: Calibrate at 40 Yards
After the 50-yard zero, use the 40-yard aiming point to calibrate the scope to your crossbow speed. If the arrow hits high, slightly lower the speed setting. If the arrow hits low, slightly raise the speed setting.
Step 7: Do Not Randomly Change the Dial
Once calibrated, do not adjust the FPS dial for other distances. If you change the dial later, you may need to repeat the calibration process.
For a deeper walkthrough, read: How to Sight In a Ravin Crossbow Scope.
Ravin FPS Speed Dial Explained
The FPS dial is one of the most confusing parts of Ravin scope setup for beginners. It helps the scope match the speed of your crossbow and arrow setup.
Think of it like this: your arrows travel in an arc. The faster or slower the arrow setup is, the more the distance marks need to match that arrow path.
When to Adjust the FPS Dial
- Before your first shot, set it to the advertised speed of your crossbow.
- After zeroing, use it to calibrate your reticles.
- If you change total arrow weight, repeat the sight-in process.
When Not to Adjust It
- Do not use it like a normal magnification dial after calibration.
- Do not change it randomly to fix one bad shot.
- Do not adjust it for every distance once your scope is calibrated.
Accuracy and Performance Tips
Scope setup is only one part of accuracy. If your Ravin still shoots poorly after proper scope setup, check the full accuracy system.
Check Scope Cant
If shots drift left or right as distance increases, scope cant or crossbow tilt may be the cause.
Check Eye Relief
If your sight picture changes from shot to shot, your eye position may be inconsistent.
Check Arrow Condition
Damaged arrows, cracked nocks, curled vanes, or incorrect components can create unsafe and inaccurate shooting.
Check Your Shooting Rest
A weak rest can cause inconsistent groups. Use a stable bench, bags, or shooting rest when sighting in.
Check Your Trigger Press
Pull the trigger slowly and smoothly. Do not slap the trigger or lift your head right after the shot.
| Problem | Possible Cause | Beginner Fix |
|---|---|---|
| Shots hit left or right | Scope cant, wind, uneven shooting position | Level the scope, shoot from a stable rest, and confirm with groups |
| Reticle looks blurry | Ocular lens not focused | Adjust the rear eyepiece until the reticle is sharp |
| Dark shadow in scope | Poor eye relief | Move scope forward/backward until the image is full |
| Groups are scattered | Unstable rest, damaged arrows, rushed trigger | Inspect arrows, slow down, and shoot controlled groups |
| Distances do not match reticles | FPS dial not calibrated | Repeat zero and speed calibration process |
For more help, read: How to Improve Ravin Crossbow Accuracy.
Ravin Scope Maintenance and Care
Your scope is a precision instrument. Treat it carefully and keep it protected.
Basic Scope Care
- Keep lens covers on when the scope is not in use.
- Store the crossbow and scope in a cool, dry location.
- Do not store the scope in a hot vehicle for long periods.
- Use the included lens cloth or optical lens paper for cleaning.
- Remove dirt with a soft brush before wiping the lens.
- Do not disassemble or clean the scope internally.
Check Zero After Travel
After travel, storage, or hard bumps, check point of impact before taking long-range shots. Start close, then move back.
For full crossbow care, read: Ravin Crossbow Maintenance Guide.
Recommended Beginner Accessories
The right accessories make Ravin scope setup easier. Focus on practical tools that solve beginner problems.
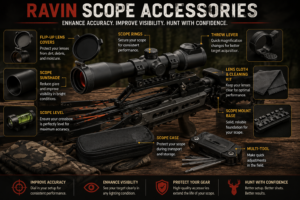
Helpful Accessories
- Bubble level or scope leveling kit: Helps prevent scope cant.
- Torque driver: Helps avoid over-tightening scope rings.
- Crossbow-rated target: Required for safe sight-in practice.
- Shooting rest or bags: Reduces shooter wobble during sight-in.
- Rangefinder: Helps confirm actual target distance.
- Lens cleaning cloth: Keeps optics clear without damaging coatings.
- Approved Ravin arrows: Essential for safe performance.
Helpful Ravin Setup Gear
If you are setting up your Ravin scope for the first time, start with practical gear: a scope level, torque driver, stable rest, approved arrows, and a safe crossbow target. These help solve real beginner problems without overcomplicating your setup.
Supporting Articles and Internal Links
- How to Set Up a Ravin Crossbow for Beginners
- Ravin Crossbow Instructions for Beginners
- Ravin R5X Out of Box Setup Tips
- Ravin Crossbow First Shot Checklist
- Ravin Crossbow Eye Relief Adjustment Guide
- How to Level a Ravin Crossbow Scope at Home
- How to Sight In a Ravin Crossbow Scope
- How to Improve Ravin Crossbow Accuracy
- Ravin Crossbow Maintenance Guide
FAQ: Ravin Scope Setup Tutorial for Beginners
How do I set up a Ravin scope as a beginner?
Start by making the crossbow safe, mounting the scope correctly, setting eye relief, leveling the scope, adjusting ocular focus, setting the FPS dial, then sighting in at safe distances.
What eye relief should I use on a Ravin scope?
Many Ravin scope setups use about 2–3 inches of eye relief. The goal is a full, clear image while holding the crossbow naturally.
Do I need to level my Ravin scope?
Yes. A tilted scope can cause left and right misses, especially as distance increases.
What distance should I start sighting in a Ravin scope?
Start close, usually around 10 yards, to confirm you are safely on target. Then move to 20 yards, 50 yards, and calibration distances according to your manual.
What does the FPS speed dial do?
The FPS dial helps match the scope’s yardage marks to the speed of your crossbow and arrow setup. Once calibrated, it should not be changed casually.
Why is my Ravin scope blurry?
The ocular lens may need adjustment. Rotate the rear eyepiece until the reticle appears sharp and clear to your eye.
Why are my Ravin shots hitting left or right?
Possible causes include scope cant, wind, uneven shooting position, unstable rest, or arrow issues. Start by checking scope level and shooting from a stable rest.
Can I use a different scope on my Ravin?
The manual says the included scope is specifically designed for your Ravin crossbow, and using a scope not matched to the crossbow may affect accuracy. Follow your manual and consult a pro shop if unsure.
Should I adjust the FPS dial after sighting in?
No. Once the scope is calibrated, do not adjust the FPS dial for other distances. If you change arrow weight or speed setup, repeat the sight-in process.
Conclusion
A Ravin scope setup does not have to be confusing. The key is following the right order: make the crossbow safe, mount the scope carefully, set eye relief, level the scope, focus the reticle, set the FPS dial, sight in at safe distances, and confirm your accuracy before hunting.
Do not rush. Do not guess. Do not adjust random knobs after one bad shot. A careful setup process will save you time, arrows, and frustration.
Before your next range session, download the free Ravin Owner Maintenance Pack and use it as your setup, inspection, maintenance, and range-day guide.
Get The Free Ravin Owner Maintenance Pack
Get all 6 printable Ravin owner resources in one free download and avoid costly beginner mistakes.
- ✓ Beginner Setup Checklist
- ✓ Maintenance Checklist
- ✓ String Inspection Sheet
- ✓ Pre-Season Inspection Checklist
- ✓ Range Day Checklist
- ✓ Maintenance Calendar
“`