How to Level a Ravin Crossbow Scope at Home
A crooked scope can quietly wreck your accuracy. If your Ravin is grouping left, right, or drifting as distance increases, your scope may not be level. This beginner guide shows you how to check scope cant, level your setup, and avoid frustrating sight-in problems.
- ✓Learn why scope cant causes left and right misses
- ✓Follow a simple at-home scope leveling process
- ✓Avoid beginner mistakes before sighting in your Ravin
Table of Contents
Introduction
What Is Scope Cant?
Why Scope Leveling Matters
Tools You Need
How to Level a Ravin Crossbow Scope at Home Step by Step
Common Beginner Mistakes
Troubleshooting Scope Level Problems
Recommended Beginner Resources
FAQ
Conclusion
Introduction
Learning how to level a Ravin crossbow scope at home is one of the easiest ways to remove a hidden accuracy problem from your setup. A scope can look straight to your eye and still be slightly tilted.
That small tilt is called scope cant. At close range, you may barely notice it. But as distance increases, a tilted scope can create left and right misses that make sighting in frustrating.
The goal of this guide is simple: help you level your Ravin scope carefully before you waste time chasing bad groups. You do not need to be a bow technician. You just need a stable setup, a simple level, and a slow process.
Get The Free Ravin Owner Maintenance Pack
Avoid expensive beginner mistakes with our free Ravin Owner Maintenance Pack.
- ✓ Beginner Setup Checklist
- ✓ Maintenance Checklist
- ✓ String Inspection Sheet
- ✓ Pre-Season Inspection Checklist
- ✓ Range Day Checklist
- ✓ Maintenance Calendar
What Is Scope Cant?
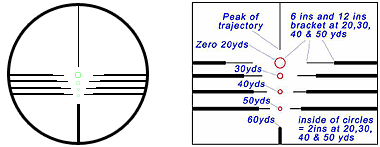
Scope cant means the scope is tilted slightly left or right instead of sitting level with the crossbow. The reticle may appear close enough, but close enough is not always good enough when you are trying to build repeatable accuracy.
Imagine drawing a straight vertical line through your scope. If that line leans left or right, your aiming reference is no longer lined up correctly. At longer distances, this can make your arrows drift sideways.
Level Scope
The reticle is straight, the crossbow is stable, and your adjustments are easier to trust.
Canted Scope
The reticle leans left or right, which can cause confusing misses as distance increases.
Beginner Confusion
Many new shooters blame arrows, wind, or the crossbow before checking scope level.
Why Scope Leveling Matters for Ravin Accuracy
Ravin crossbows are capable of strong accuracy, but the scope needs to work with the crossbow. If the reticle is tilted, your windage and elevation adjustments can feel confusing.
For example, you may adjust elevation because your arrows are hitting low. But if the scope is canted, that adjustment may also create unwanted sideways movement.
A level scope helps your sight-in process make sense. It removes one hidden variable so you can focus on the rest of the accuracy system: eye relief, arrow condition, shooting rest, trigger press, and distance control.
Proper Scope Leveling Helps With:
- Reducing left and right misses
- Making sight-in adjustments easier
- Improving confidence at longer distances
- Separating setup problems from shooter error
- Building a better first-shot routine
Do Not Guess Your Setup
Before you sight in your Ravin, download the free Ravin Owner Maintenance Pack and walk through the setup basics in order. It helps you avoid the most common beginner mistakes before they cost you arrows, time, or confidence.
- ✓ Beginner Setup Checklist
- ✓ Maintenance Checklist
- ✓ String Inspection Sheet
- ✓ Pre-Season Inspection Checklist
- ✓ Range Day Checklist
- ✓ Maintenance Calendar
Tools You Need to Level a Ravin Scope
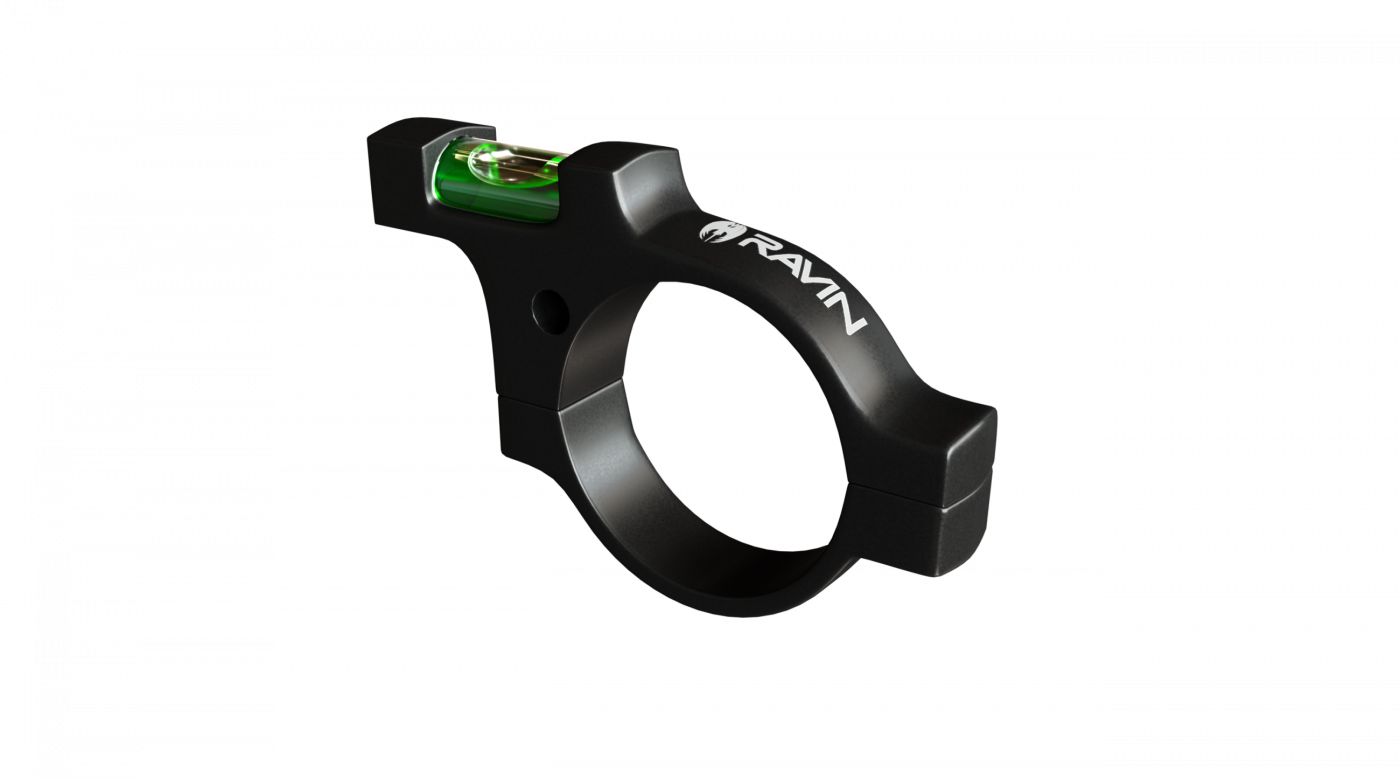
You do not need a fancy workshop to level your Ravin scope at home. Simple tools can help you do a careful beginner-level check.
- Small bubble level or scope leveling kit
- Stable shooting bench, workbench, or table
- Shooting bags or a secure crossbow rest
- Allen wrench or torque driver
- Good lighting
- Vertical reference point, plumb line, or level wall edge
- Your official Ravin owner’s manual
How to Level a Ravin Crossbow Scope at Home Step by Step
Step 1: Make the Crossbow Safe
Before adjusting anything, confirm the crossbow is unloaded and pointed in a safe direction. Keep arrows away from the rail while you work.
Do not work on a loaded crossbow. Do not place fingers near the string path. Do not rush because you are excited to shoot.
Step 2: Stabilize the Crossbow
Place the Ravin on a stable bench, shooting bags, or secure rest. The crossbow should not rock, slide, or lean while you are checking the scope.
This step matters because you are trying to level the scope to the crossbow. If the crossbow itself is moving, your scope reading will not be reliable.
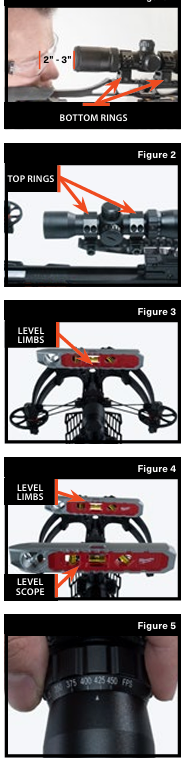
Step 3: Level the Crossbow First
Do not start by rotating the scope. First, level the crossbow. Place a bubble level on a flat and reliable reference area that makes sense for your setup.
Adjust the crossbow until the bubble is centered. Take your time here. This is the foundation for the rest of the process.
Step 4: Loosen the Scope Rings Slightly
Loosen the scope ring screws just enough so the scope can rotate. Do not remove the scope unless you are fully remounting it.
Be careful not to slide the scope forward or backward. If the scope moves too much, your eye relief may change.
Step 5: Align the Reticle
Look through the scope and rotate it until the vertical crosshair appears straight up and down. A door frame, plumb line, or vertical wall edge can help as a visual reference.
Do not rush this step. Your head position can trick your eye, so reset your posture and check again.
Step 6: Tighten the Scope Rings Evenly
Tighten scope ring screws gradually using a cross-pattern. Do not tighten one screw all the way down before the others.
Uneven tightening can twist the scope and ruin the alignment you just created.
Step 7: Recheck Everything
After tightening, recheck the crossbow level and the reticle. Small shifts can happen while tightening screws.
If something moved, loosen slightly and correct it. This is normal. Beginners should expect to check more than once.
Step 8: Confirm at the Range
Leveling at home is only the setup step. After that, confirm your Ravin at the range.
Start close, then move back slowly. Do not make huge adjustments after one arrow. Shoot controlled groups and adjust based on the center of the group.
Helpful Beginner Gear
A small bubble level, stable shooting rest, rated crossbow target, and approved arrows can make your setup easier and safer. Start with practical gear that helps you confirm accuracy, not random upgrades.
Common Beginner Scope Leveling Mistakes
Trusting Your Eye
A scope can look straight but still be slightly tilted. Use a level instead of guessing.
Skipping Eye Relief
If the scope moves forward or backward, your sight picture may change and hurt consistency.
Overtightening Rings
Too much pressure can shift the scope or damage parts. Tighten gradually and evenly.
Mistake 1: Leveling the Scope Before the Crossbow
The crossbow should be level first. If the crossbow is tilted while you adjust the reticle, your scope may appear level when it is not.
Mistake 2: Ignoring Loose Hardware
Loose rings or mounting screws can move under vibration. If your point of impact changes between sessions, check the scope mount.
Mistake 3: Expecting Leveling to Fix Everything
Scope leveling helps, but it does not fix damaged arrows, poor shooting form, bad eye relief, loose mounts, wrong broadheads, or skipped maintenance.
Troubleshooting Scope Level Problems
Use this table if your Ravin still feels off after leveling the scope.
| Problem | Possible Cause | Beginner Fix |
|---|---|---|
| Shots hit left or right at longer distance | Scope cant, windage issue, uneven shooting position | Recheck scope level, shoot from a stable rest, and confirm windage slowly |
| Scope looked level but shifted after tightening | Rings tightened unevenly | Loosen slightly, realign, and tighten gradually in a cross-pattern |
| Dark shadow in the scope | Poor eye relief or inconsistent head position | Adjust eye relief and use the same cheek position each shot |
| Groups are wide and scattered | Shooter movement, unstable rest, damaged arrows, loose scope | Inspect arrows, stabilize the crossbow, and check all scope hardware |
| Point of impact changes between range sessions | Loose mount, travel bump, storage issue, different arrows | Recheck scope level, mounts, arrows, and zero before hunting |
Recommended Beginner Resources
- Ravin Crossbow First Shot Checklist for Beginners
- How to Set Up a Ravin Crossbow for Beginners
- Ravin Scope Setup Tutorial for Beginners
- How to Sight In a Ravin Crossbow Scope
- Ravin Crossbow Eye Relief Adjustment Guide
- How to Improve Ravin Crossbow Accuracy
- Ravin Crossbow Maintenance Guide
Do You Want the Full Ravin Owner Pack?
If you are setting up your Ravin for the first time, do not rely on memory. Download the free Ravin Owner Maintenance Pack and walk through setup, maintenance, inspection, pre-season prep, range-day checks, and maintenance scheduling.
- ✓ Beginner Setup Checklist
- ✓ Maintenance Checklist
- ✓ String Inspection Sheet
- ✓ Pre-Season Inspection Checklist
- ✓ Range Day Checklist
- ✓ Maintenance Calendar
FAQ
Do I need a bubble level to level a Ravin crossbow scope?
Yes. A small bubble level or scope leveling kit is strongly recommended because guessing by eye can miss small cant problems.
Should I level the crossbow or the scope first?
Level the crossbow first. Then align the scope reticle to the leveled crossbow platform.
Can a crooked scope make my Ravin shoot left or right?
Yes. A tilted scope can cause left or right misses, especially as distance increases.
Will leveling my scope fix every accuracy problem?
No. Scope leveling fixes one setup issue. Accuracy also depends on arrows, eye relief, shooting form, sight-in, maintenance, and rest stability.
How often should I check scope level?
Check after travel, hard bumps, scope adjustments, major setup changes, or any time your point of impact suddenly changes.
Conclusion
Leveling your Ravin scope is not flashy, but it is one of the smartest beginner setup steps. A level scope gives you a better starting point before sighting in, adjusting windage, testing arrows, or preparing for hunting season.
Start safe. Stabilize the crossbow. Level the crossbow first. Align the reticle. Tighten evenly. Recheck everything. Then confirm at the range with slow, controlled groups.
Before your next range session, download the free Ravin Owner Maintenance Pack and use it as your setup, inspection, maintenance, and range-day guide.
Get The Free Ravin Owner Maintenance Pack
Get all 6 printable Ravin owner resources in one free download and avoid costly beginner mistakes.
- ✓ Beginner Setup Checklist
- ✓ Maintenance Checklist
- ✓ String Inspection Sheet
- ✓ Pre-Season Inspection Checklist
- ✓ Range Day Checklist
- ✓ Maintenance Calendar
“`